6. Baselining Best Practices
This section assumes, that you have read the Basic Concepts.
All incoming logs, that do not match an existing case, will show up in
the Baselining section.
While importing the logs, the cockpit will already try to find logs are
that similar and represent the same type of alert or warning. It will
group these logs and assign an auto_case_id.

Baselining Overview
6.1. Customize Your View
By default, the Analysis Cockpit Baselining view ships with multiple bar
charts and a table with the most relevant columns in order to help you find
meaningful groups of logs. You can add additional bar charts by clicking on
the Advanced Tools button and selecting Chart Preferences.
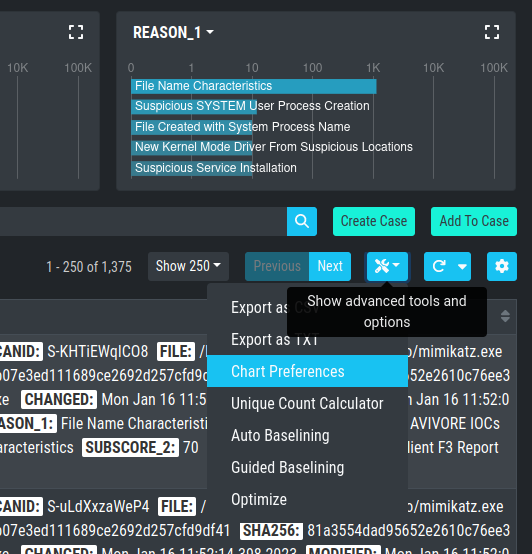
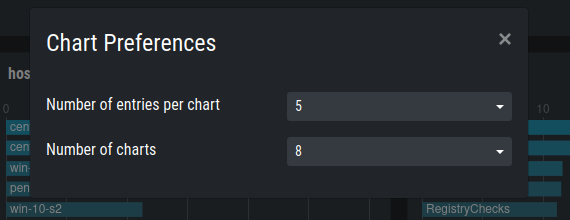
Chart Preferences
You can also modify which bar charts are shown by the name/field-name of the chart and choose the category you want to see. To get more details about a bar chart, you can click on square symbol in the heading of the bar chart.
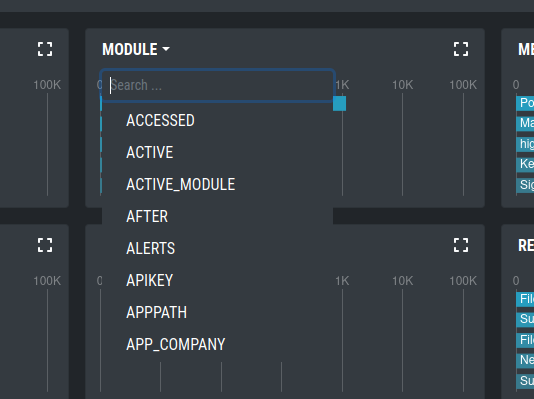
Bar Chart Selector
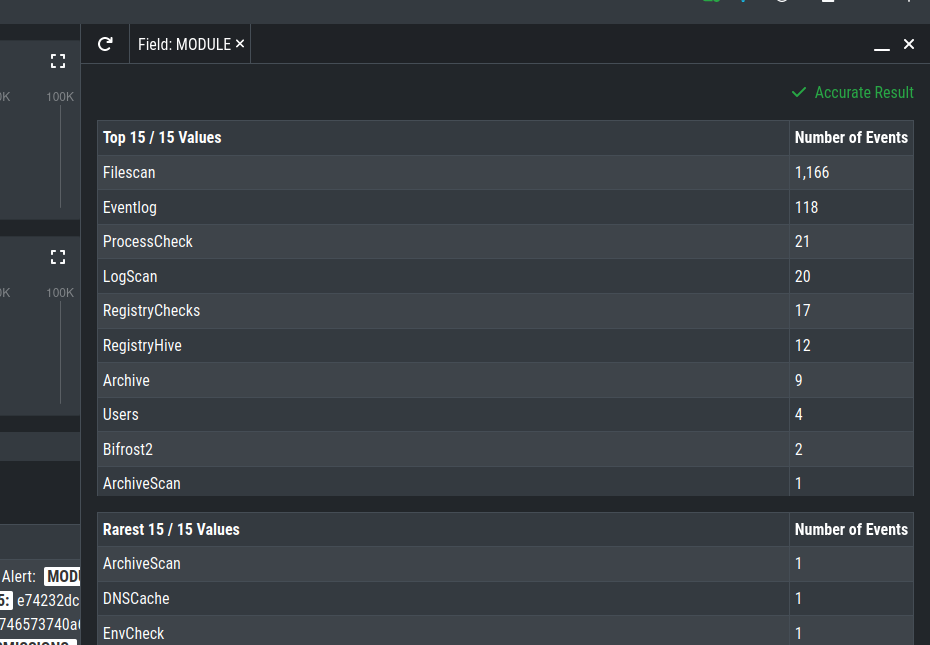
Bar Chart Details
Click the Columns button to manage which columns are shown.
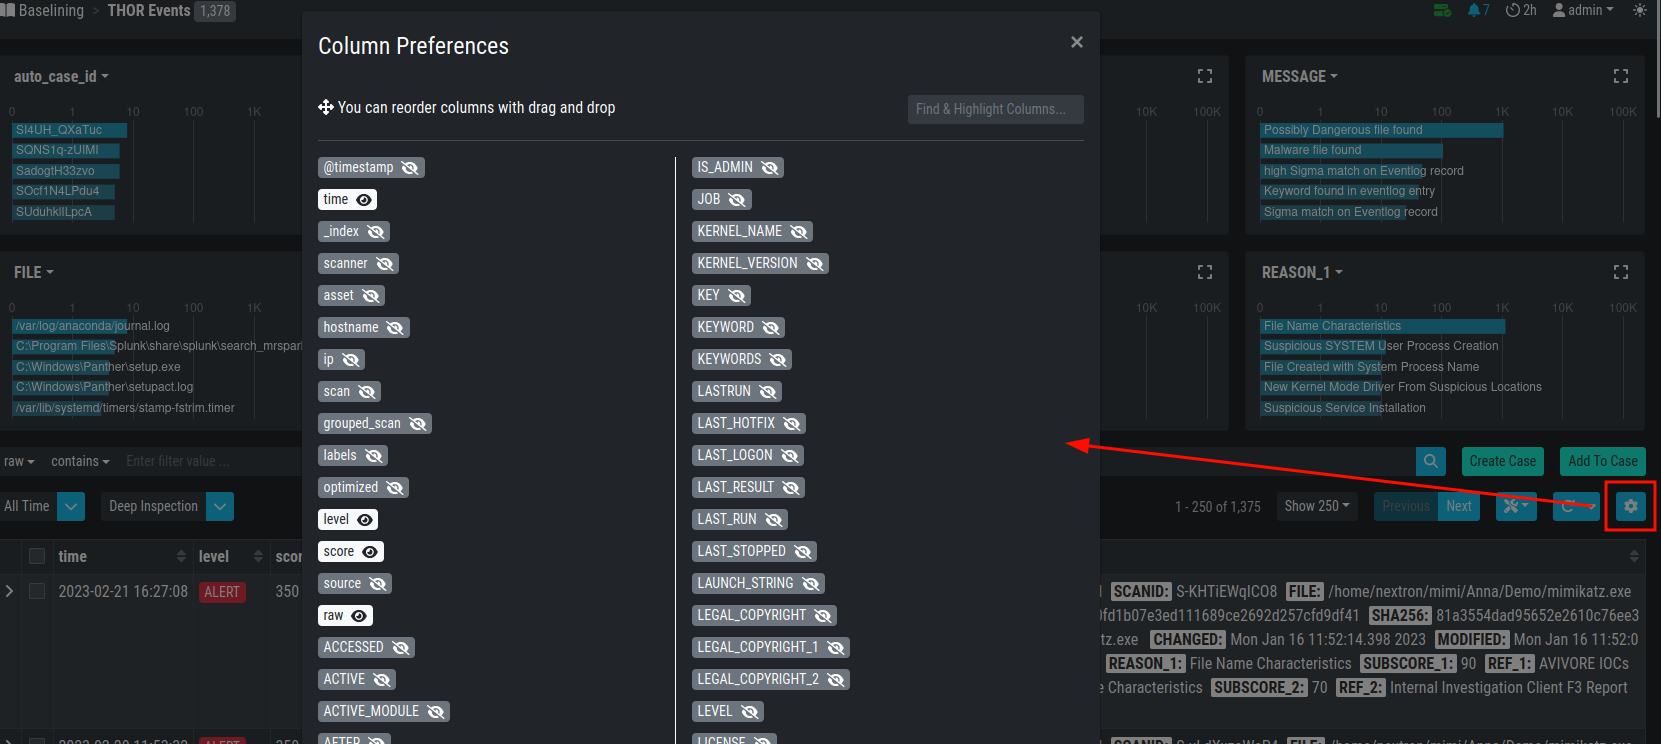
Column Preferences
Hint
All views are personalized and changes will only affect your user.
6.2. Manual Case Creation
6.2.1. Case Creation Basics
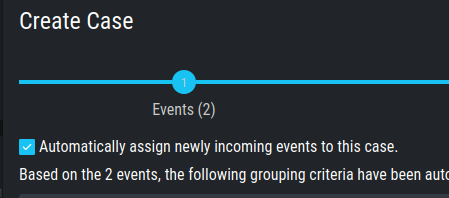
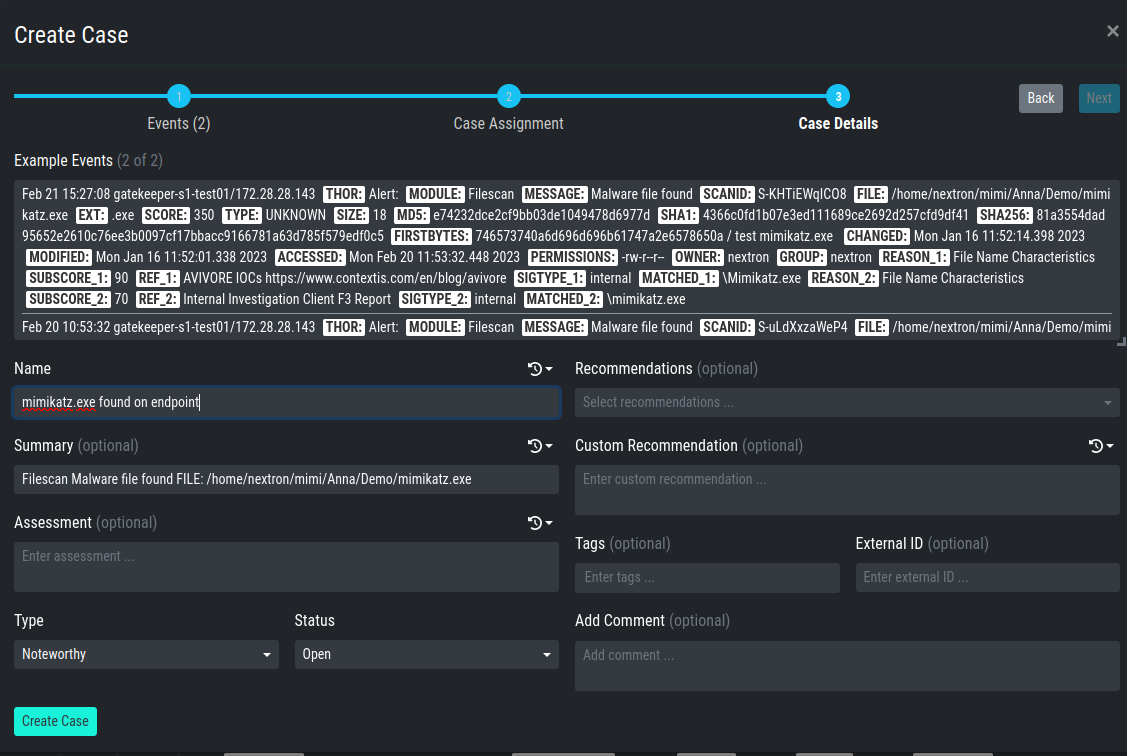
Create a new case following these steps:
Select on which conditions the case should be built

Inspect the Case Assignment and Conditions. Set Auto Assign if needed.
Set a case name, which serves as title - use keywords that make it easy for other analysts to find it based on a few terms (e.g. if a false positive was caused by matches in savedsearch.conf, use this filename in the title of your case)
Select a sample event for the summary field
Add your assessment
Choose one or more recommendations
Select a case type (see the Glossary for a detailed description of every case type)
Select a case status (usually used to mark it as 'work in progress' or to forward it to the next team)
Submit case by clicking the Create Case button
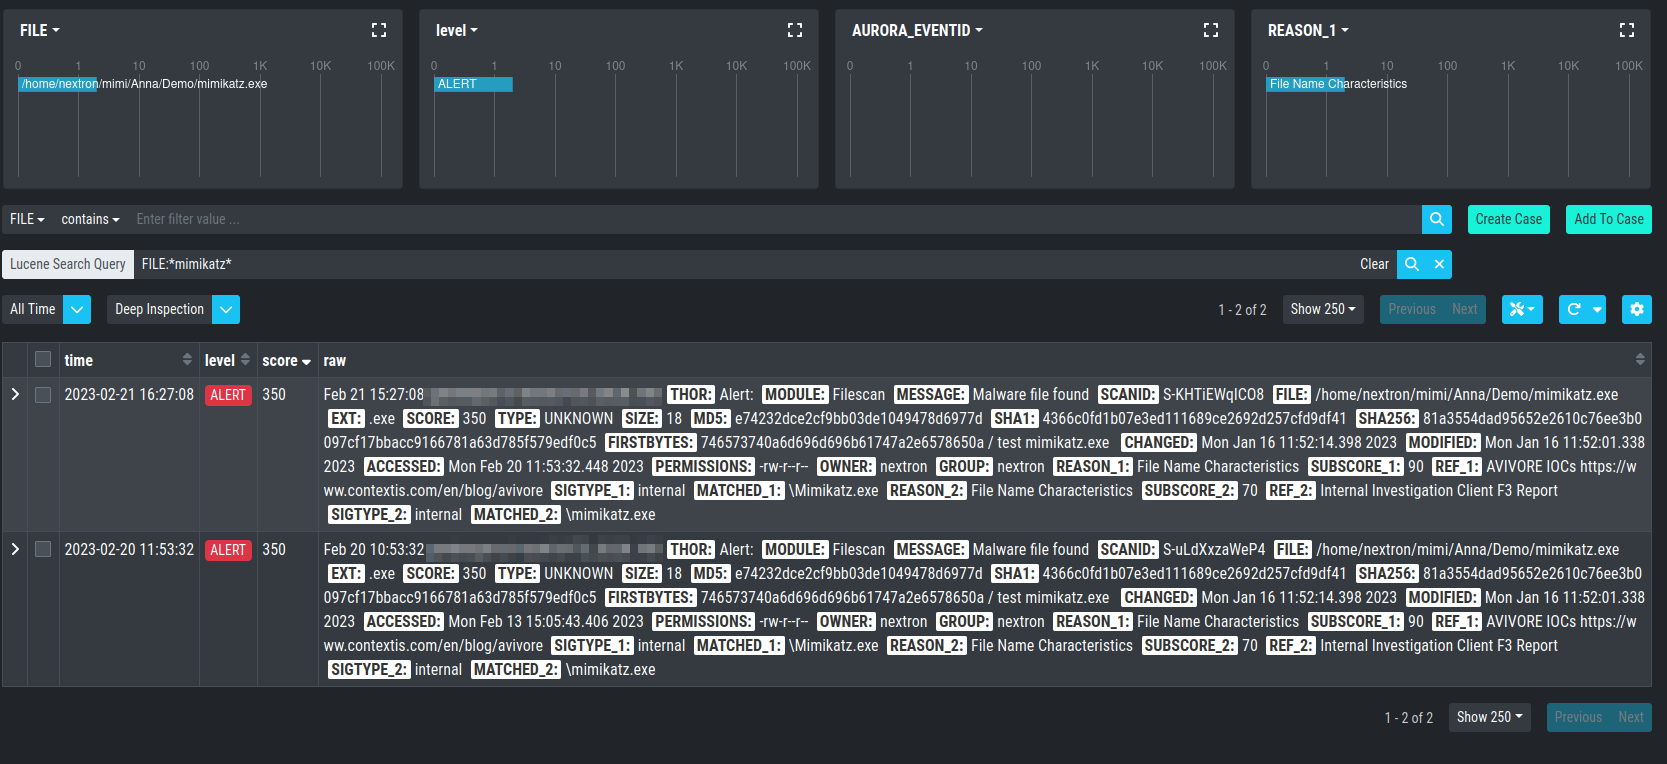
6.2.2. Select Log Messages for a Case
In order to create a meaningful case, you typically start with selecting logs or groups of logs that you want to be contained in the case. This can be done in various ways:
by adding a custom filter in the search bar
by clicking on one of the bars in the bar chart
by clicking on the filter symbol in a field in a log line
by using the Lucene Search Query
You can generate a filter condition using an expression in the search field, choosing a category, deciding whether the expression should be contained, equal etc. and clicking the search button. Clicking on one of the bars in the bar chart or on the filter symbol in a field in a log line will generate a filter condition, too.
Active Filters
Hint
Filters can be negated by clicking on the two arrows symbol or delete it by clicking on the cross symbol.
Using the built-in custom filters is the most common and easiest way to select groups of logs.
For those who prefer Lucene, an additional Lucene search bar can be activated and can even be combined with the built-in custom search.
In order to activate the Lucene Query search just click the contains button and
choose Lucene Query.
Lucene Query
Note
You can Alt/Shift click items in the top field view to add them as a NOT filter to your search.
6.2.3. Case Creation from Search Results
This is the most relevant way to create a case. Create the filters, so
that you only see the logs you want to be contained in your case. Then
click the Create Case button, select Search results and add a name,
that makes sense to you.
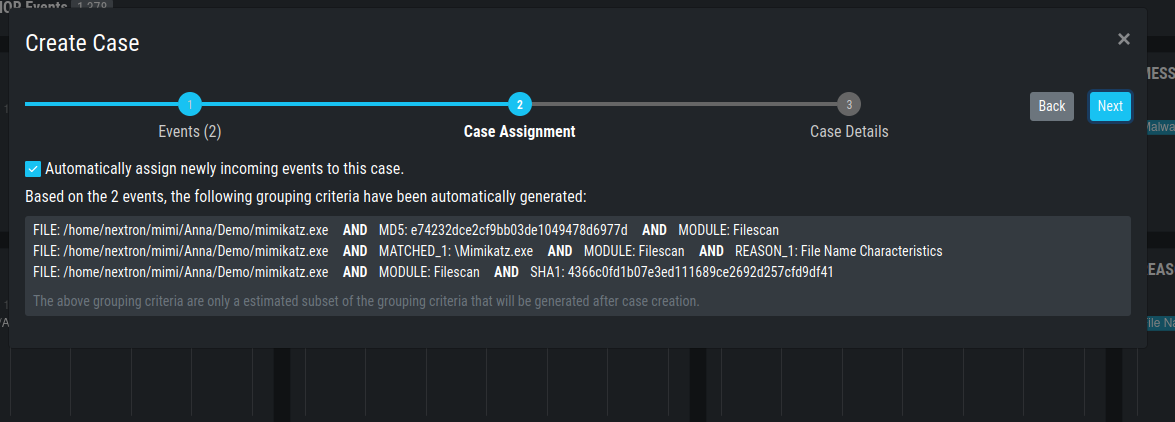
If you want future incoming logs with the same log lines automatically assigned to this
case, you have to tick the checkbox Automatically assign newly incoming events to this case..
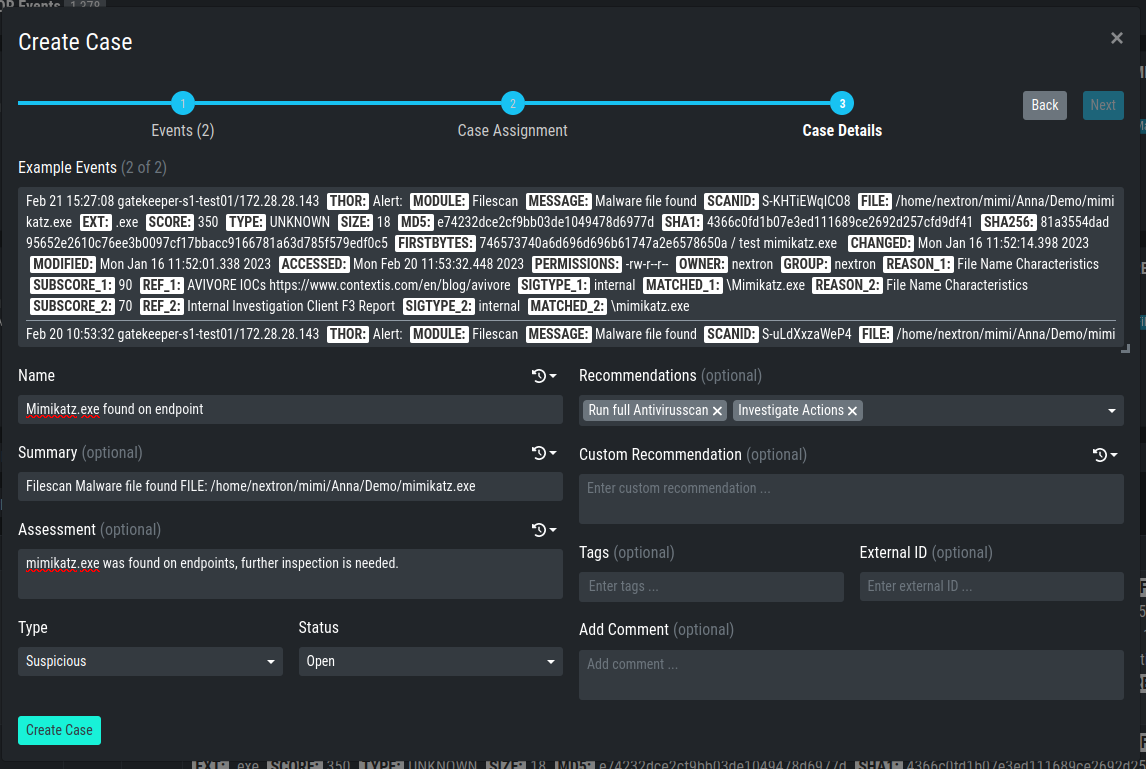
You may add a summary to your case.
Baselining – Create Case
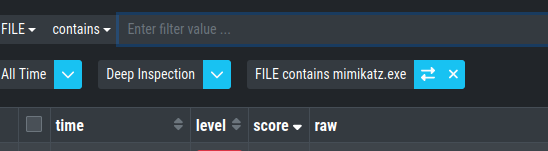
You may or may not add assessment, case type, recommendations or a comment. After closing you will find the log section empty, as it is still using your filter, but the matching log lines have been removed from this section and added to the case.
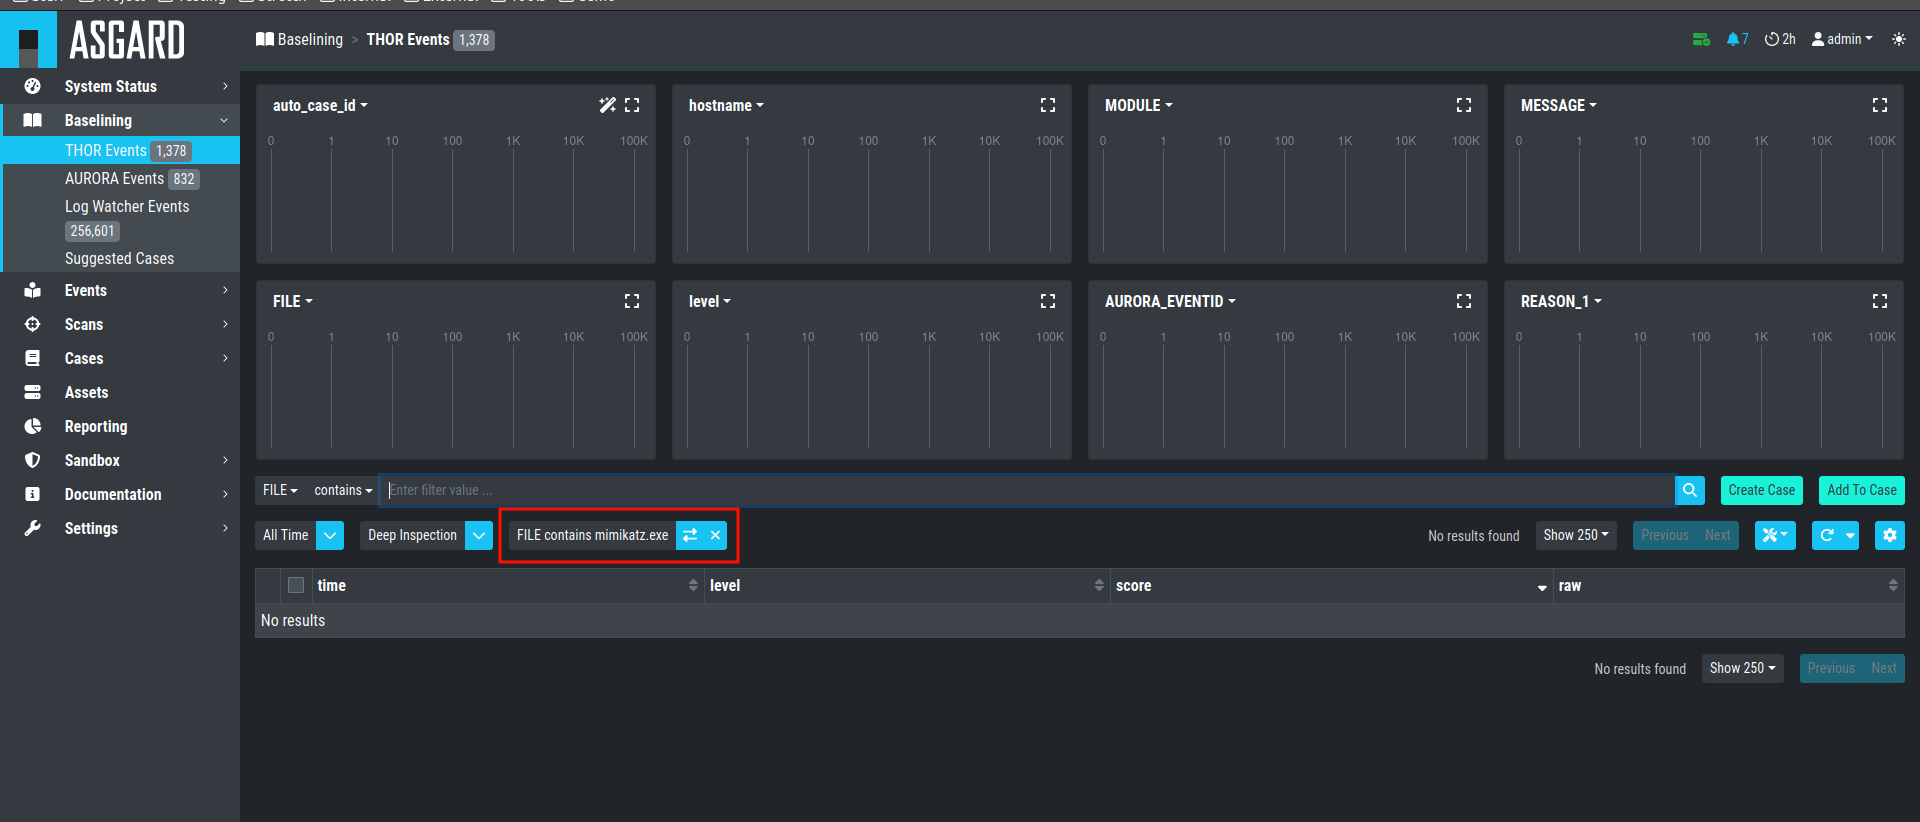
Log Section empty
Simply remove the filter and the remaining log lines will show up.
6.2.4. Case Creation from Selection
In order to create a case from a specific selection of logs simply use
the checkboxes at the very left side of the table and click the Create Case button
select Selected events and add a name, that makes sense
to you.
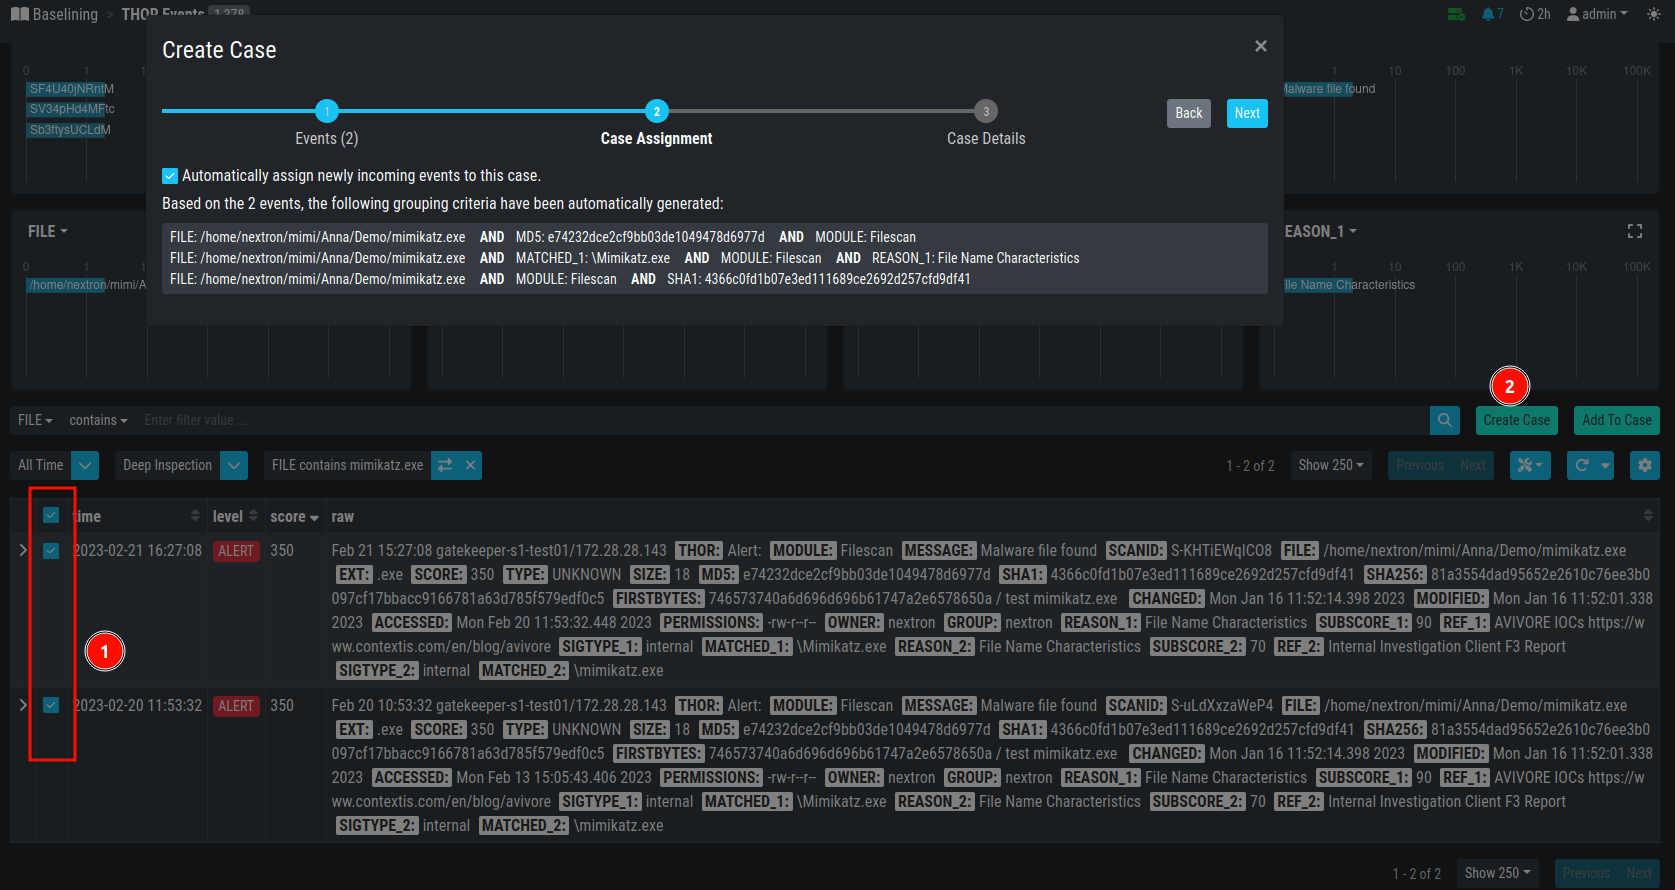
Creating Cases from Selection
After closing you will find the selected logs have been removed from the logs section.
6.2.5. Case Creation Using a Custom Condition
To create a case with a condition, click the Create Case button and
select Condition. Now you can build a condition by entering keywords
in the field.
Keywords in the same field are combined by OR, you can negate them by
clicking the NOT button or combine them with AND by clicking the
Add AND Condition button. The filter bubbles you have generated before
will be used as default. You are free to use, modify or delete them.
Conditions only match on the raw field.
The Test Condition / Regular Expression button will calculate the
numbers of hits and return some matching and some non-matching events as
an example.
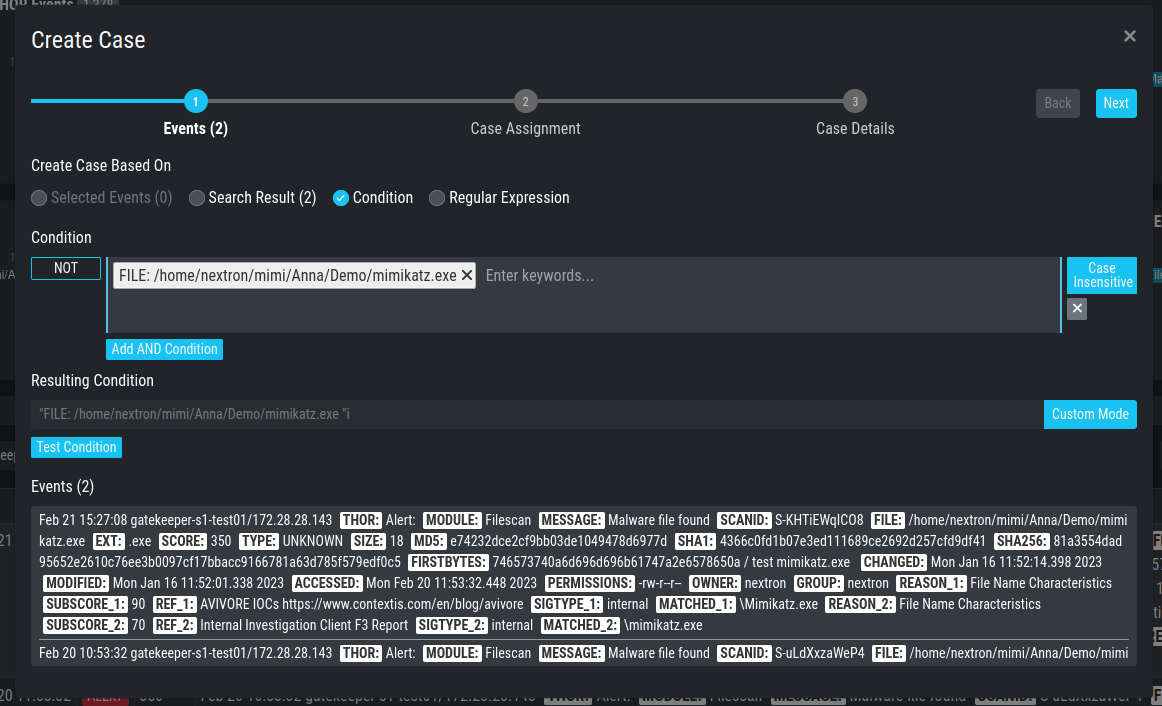
Creating Cases through Condition
Again, you may or may not add auto assignment for future incoming log lines, summary, assessment, case type, recommendations or a comment. After closing you will find the selected logs have been removed from the logs section.
6.2.6. Case Creation Using a Regular Expressions
In order to create a case from a regular expression just click the
Create Case button and select
Regular Expression. This lets you
write and test your regular expression.
The Test Condition / Regular Expression button will calculate the
numbers of hits and return some matching and some non-matching events as
an example.

Creating Cases through Regular Expressions
Again, you may or may not add auto assignment for future incoming
log lines, summary, assessment, case type, recommendations or a comment.
After clicking the Create Case button, the matching lines will get
removed from the log management view.
Warning
It is recommended to use regular expressions only rarely and with caution. This feature can severely impact the performance of the system.
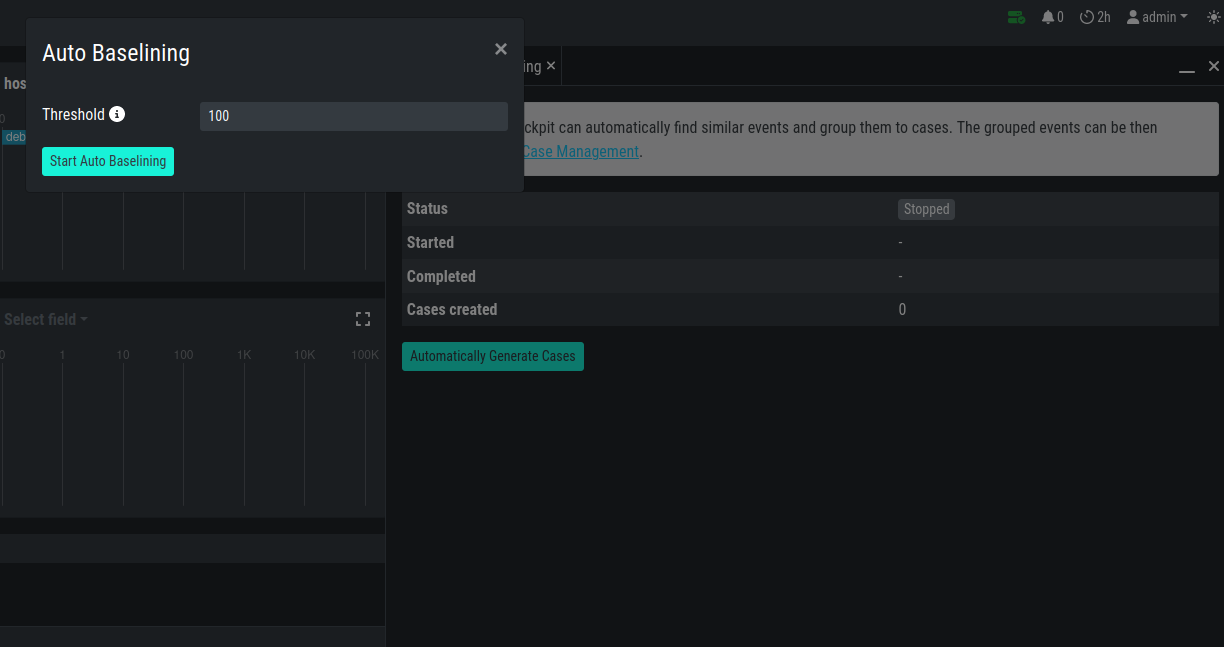
6.3. Create Cases Automatically
With Auto Baselining, the Cockpit will automatically generate cases for groups of logs that are similar, or in other words: Have the same auto_case_id.
After clicking the button Automatically generate Cases button in the
Auto Baselining tab you will be prompted for a threshold. This means:
Do only create a case when you find at least that many similar logs. In
our example below the Cockpit will now generate cases for all groups of
at least 2000 similar events.
Automatically create cases
After pressing the Start button, the Cockpit will start calculating
and create cases. Depending on the data volume this may take a while and
you will be presented a page that shows that Auto Cases is still running
along with the current number of cases.
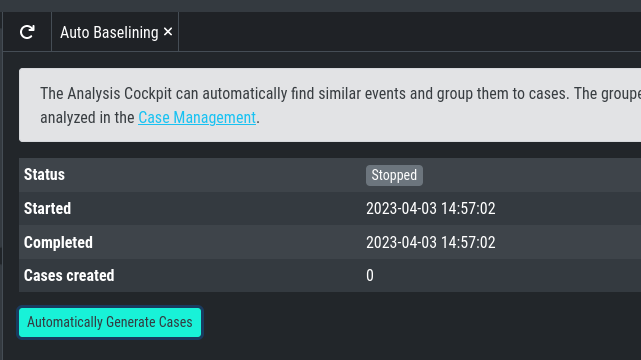
Auto Cases Status
It is safe to leave this page, once the status in Running. It will
continue in the background.
Important
The Analysis Cockpit generates auto_case_ids only for Alerts and Warnings. Don't use the Autocase feature for Notice and Info level events.
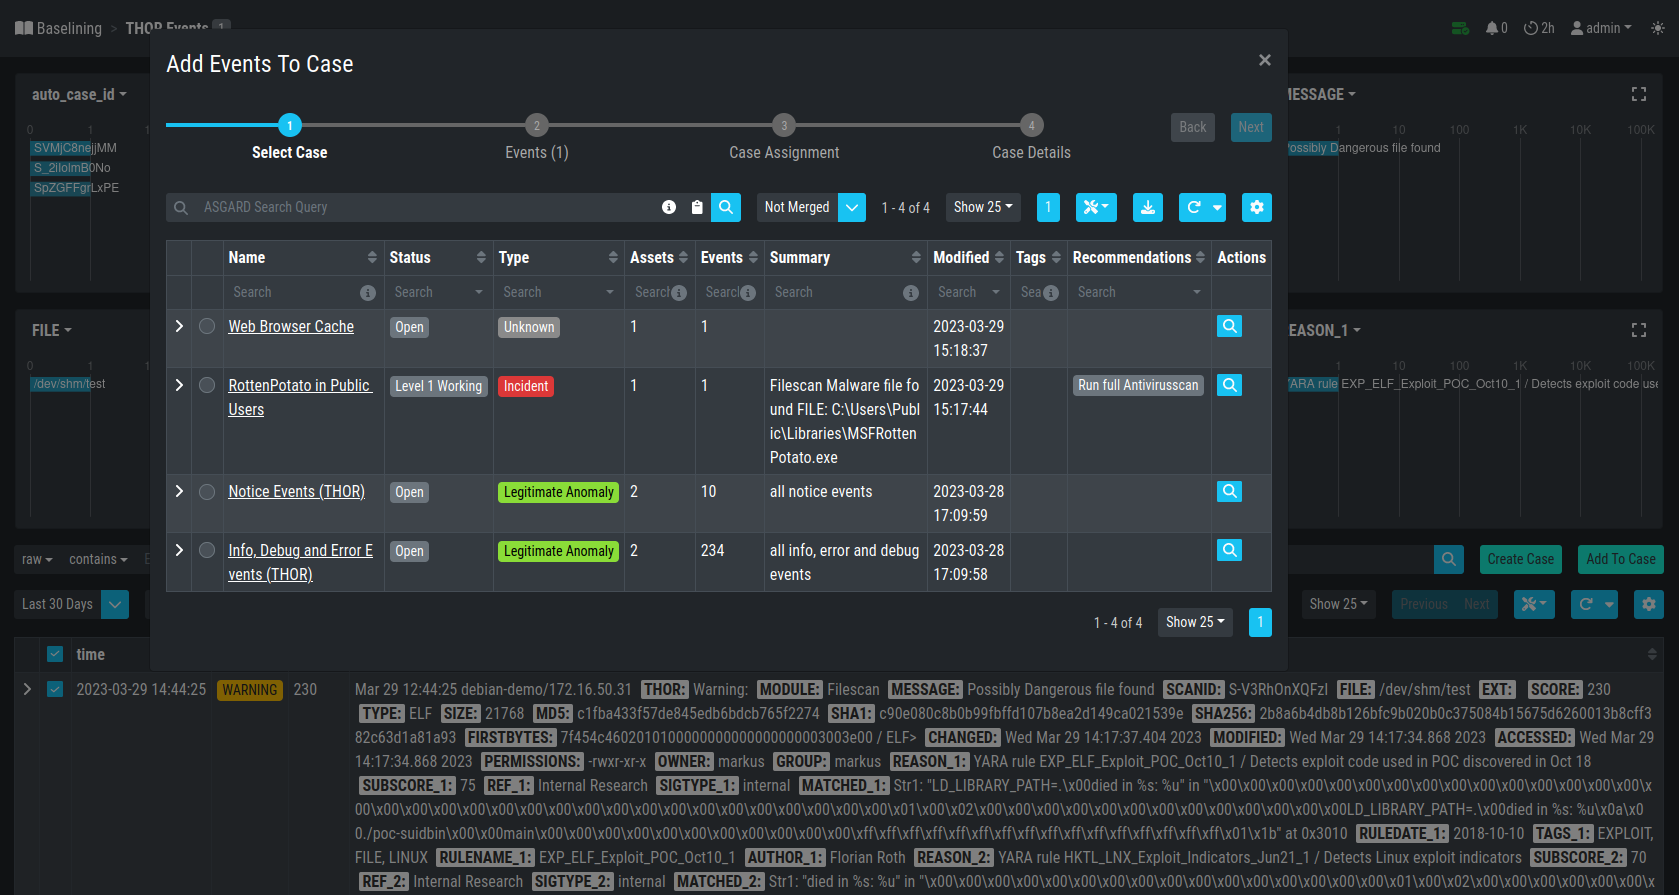
6.4. Add to Case
Sometimes you may want to add log lines to an already existing case
because they represent the same security context. To do this you can
just click the Add to Case button and select the suitable case. It is
also possible to add an additional comment to this case for the
addition.
Add to Case
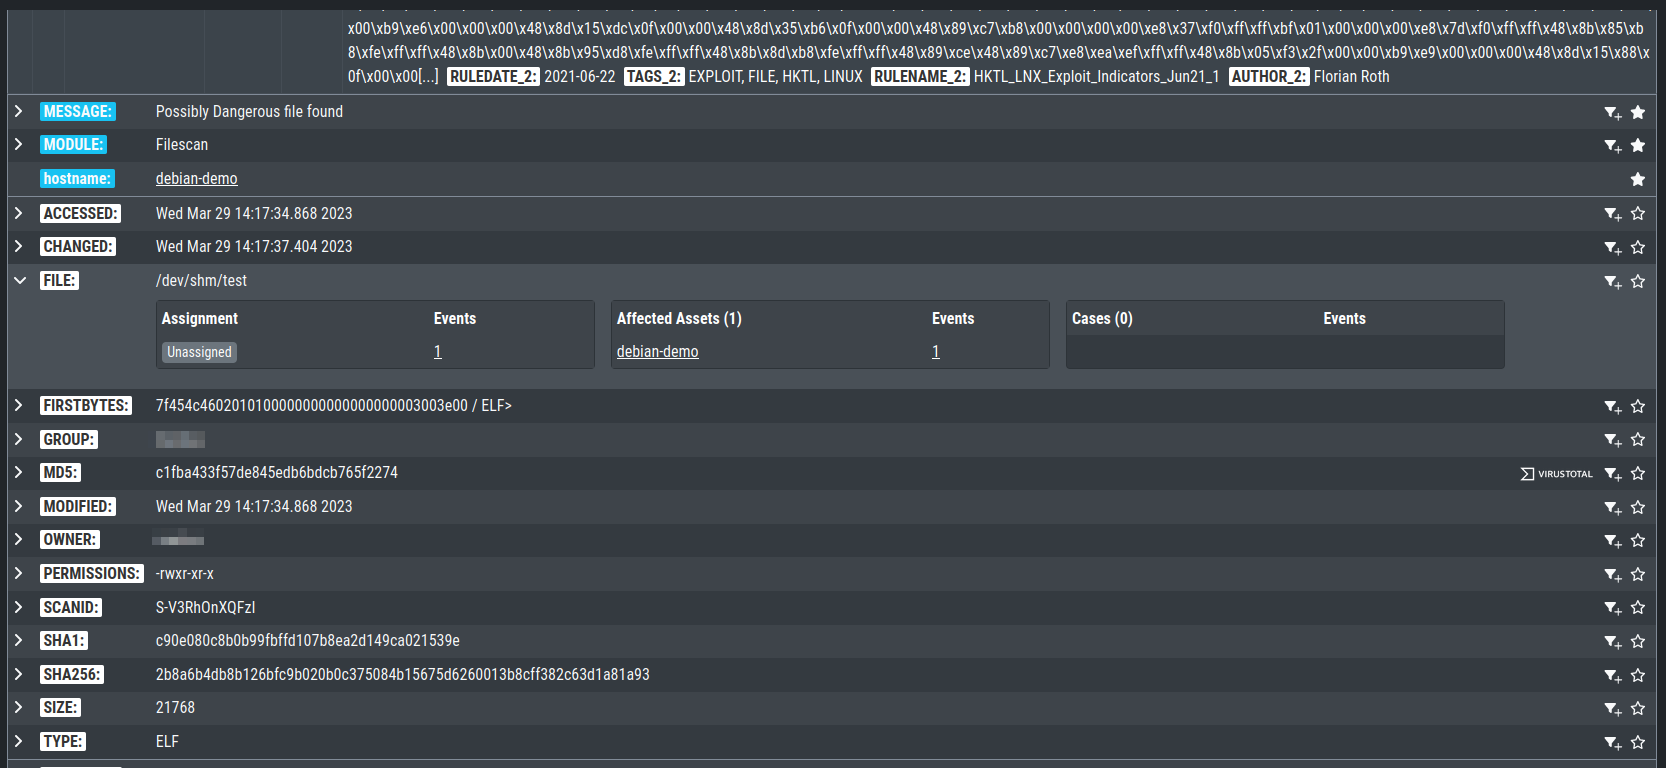
6.5. Customizing the Detailed View of Log Lines
The detailed view for log lines opens by clicking on a log line. Within
this view you can select some fields as favorite fields by clicking on
the star symbol. They will always be shown at the top of this view. MESSAGE,
MODULE and hostname are selected by default.
To search for all log lines with the same entry as this log line in a particular field, you can click the dropdown on the left hand side of the field.
Customizing the detailed view for log lines
Additionally, you can find a VIRUSTOTAL button in every hash field and a
VALHALLA button in every reason field. By clicking VIRUSTOTAL the hash
will be searched on Virustotal. By clicking VALHALLA you will get more
information about the matching rule from valhalla.nextron-systems.com.
6.6. Usage of the Context Menu
You can use the context menu on any value in your logs to get an action menu. Within this menu, you can do different actions:
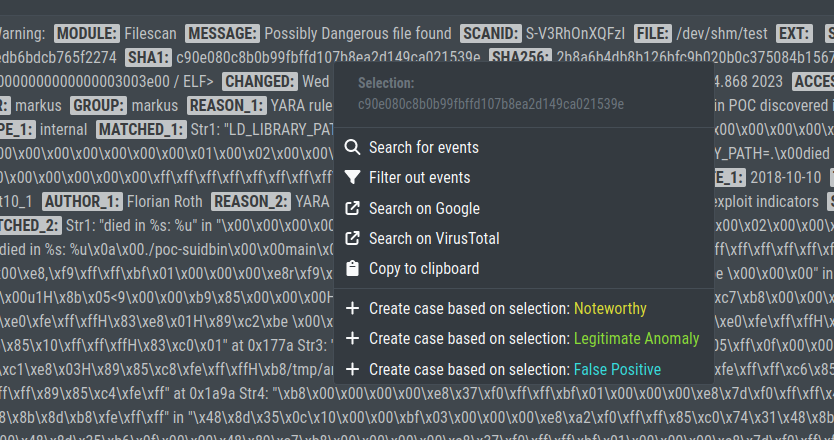
Context Menu
You can filter, search for similar events, or even create cases based on the value you right-clicked.