3.10. Sandbox Integration
You can configure your Analysis Cockpit to upload files to a local sandbox. Currently you can use CAPEv2 only.
Additionally, you can look at the following python file and write
your own connector, for a different sandbox, if you need to:
/usr/share/asgard-analysis-cockpit/sandbox/connector/capev2.py
Note
This section only focuses on the integration of your Analysis Cockpit with an existing sandbox. We will not cover how to set up the sandbox. Since the CPAEv2 Sandbox is an open source tool provided by the broader community, we encourage you to read through the extensive documentation to get an overview of the setup process.
3.10.1. Analysis Cockpit Sandbox Configuration
>Settings\Connected Systems\Sandboxes
Click Add Sandbox in the top right corner to add a new sandbox. Keep the
Name short and add a proper Description.
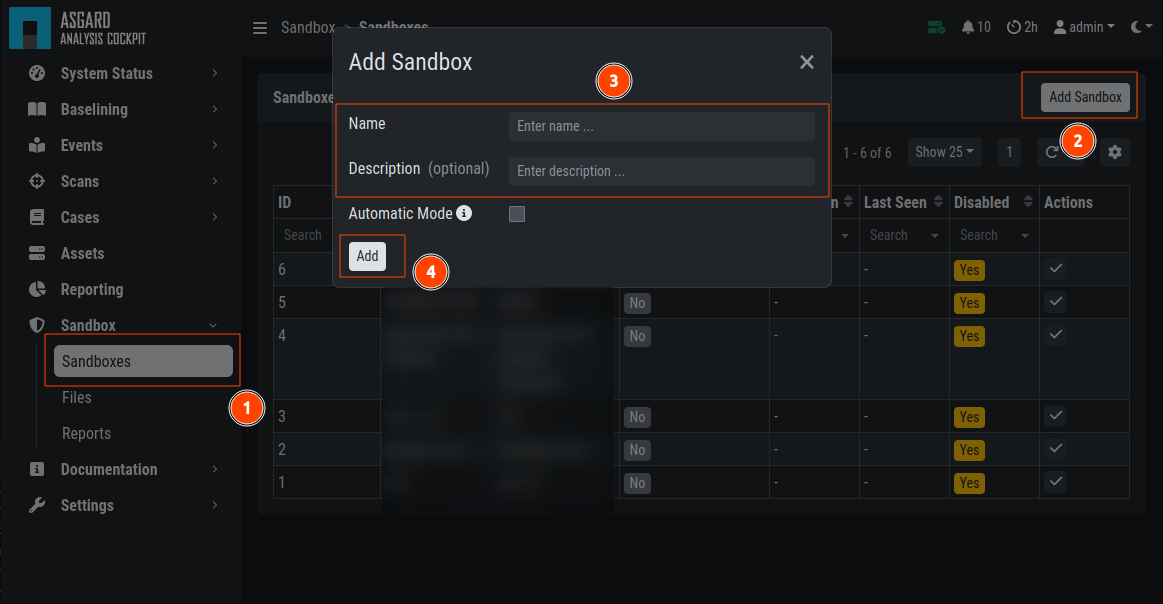
Adding a new Sandbox
If you wish to enable automatic scanning for uploaded files
(Bifrost),
you can do so by checking the Automatic Mode.
Once you click Add the page will display an API token. Copy this token, you will need it later.
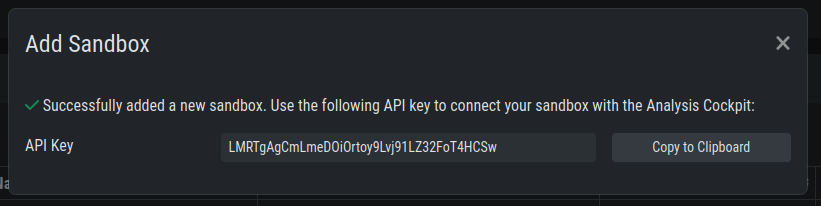
Sandbox API Token
Connect to your Analysis Cockpit via SSH and follow the steps below.
Change the user to the root user:
nextron@cockpit:~$ sudo su -
[sudo] password for nextron:
root@cockpit:~#
We change into the configuration directory of the Analysis Cockpit:
root@cockpit:~# cd /usr/share/asgard-analysis-cockpit/sandbox/connector
root@cockpit:/usr/share/asgard-analysis-cockpit/sandbox/connector#
Here you can find multiple files and folders. The .py and .ini
files each represent the type of sandbox you want to integrate with. In
this example, we will configure the CAPEv2 sandbox with our Analysis Cockpit.
root@cockpit:/usr/share/asgard-analysis-cockpit/sandbox/connector# ls -lA
total 40
drwxr-xr-x 2 root root 4096 16. Jan 11:20 analysiscockpit
-rw-r--r-- 1 root root  252 16. Jan 10:26 capev2.ini
-rwxr-xr-x 1 root root 9834 16. Jan 10:26 capev2.py
-rw-r--r-- 1 root root  277 16. Jan 10:26 cuckoo.ini
-rw-r--r-- 1 root root 9867 16. Jan 10:26 cuckoo.py
drwxr-xr-x 2 root root 4096 16. Jan 11:20 sandboxapi
Here we have two files which are of relevance to us:
capev2.ini
This holds the configuration for both the sandbox and your Analysis Cockpit
capev2.py
This has the systemd configuration to create the actual service on the system (we don't change anything in here)
Change the capev2.ini with a text editor. The important lines, which need to
be changed accordingly to your environment, are marked:
root@cockpit:/usr/share/asgard-analysis-cockpit/sandbox/connector# nano capev2.ini
 1[DEFAULT]
 2debug = yes
 3tmp_directory = /usr/share/asgard-analysis-cockpit/sandbox/capev2
 4
 5[capev2]
 6protocol = http
 7host = 192.168.0.50
 8port = 8000
 9token = <your CAPEv2 API token here>
10verify = no
11all = yes
12html = yes
13
14[analysis-cockpit]
15host = localhost:443
16apikey = <your API Key here>
17verify = no
For lines 6-10, please fill the information accordingly. host is the IP/FQDN
of your sandbox. port is the listening port of the web interface of your sandbox.
token is the API token generated in the user management of your sandbox.
verify is for verification of the TLS certificate (if you don't use TLS or don't
want to verify the certificate, set this option to no).
For lines 16-17 you have to set the apikey of your Analysis Cockpit (see "Add
Sandbox" step in the beginning of this section) and verify, which can be set to
no; this will verify the TLS certificate.
Save your files after you made your changes.
Now you have to create a new directory and give the analysiscockpit user permission:
root@cockpit:/usr/share/asgard-analysis-cockpit/sandbox/connector# mkdir /usr/share/asgard-analysis-cockpit/sandbox/capev2
root@cockpit:/usr/share/asgard-analysis-cockpit/sandbox/connector# chown -R analysiscockpit: /usr/share/asgard-analysis-cockpit/sandbox/
We need to create a systemd service file in order to run the CAPEv2 connector on your Analysis Cockpit. Below you can find a predefined service file which we will use:
 1[Unit]
 2Description=CAPEv2 Sandbox Connector
 3After=network.target
 4
 5[Service]
 6ExecStart=/usr/bin/python3 /usr/share/asgard-analysis-cockpit/sandbox/connector/capev2.py
 7Restart=on-failure
 8User=analysiscockpit
 9Group=analysiscockpit
10SyslogIdentifier=capev2_connector
11
12[Install]
13WantedBy=multi-user.target
Now we run the following command and paste the content from the output earlier into it:
root@cockpit:/usr/share/asgard-analysis-cockpit/sandbox/connector# nano /lib/systemd/system/capev2-connector.service
The file should now look like this:
root@cockpit:/usr/share/asgard-analysis-cockpit/sandbox/connector# cat /lib/systemd/system/capev2-connector.service
[Unit]
Description=CAPEv2 Sandbox Connector
After=network.target

[Service]
ExecStart=/usr/bin/python3 /usr/share/asgard-analysis-cockpit/sandbox/connector/capev2.py
Restart=on-failure
User=analysiscockpit
Group=analysiscockpit
SyslogIdentifier=capev2_connector

[Install]
WantedBy=multi-user.target

root@cockpit:/usr/share/asgard-analysis-cockpit/sandbox/connector#
Now that the systemd service file is created, we need to activate it. Run the following command:
root@cockpit:/usr/share/asgard-analysis-cockpit/sandbox/connector# systemctl daemon-reload && systemctl enable capev2-connector && systemctl start capev2-connector
Created symlink /etc/systemd/system/multi-user.target.wants/capev2-connector.service → /lib/systemd/system/capev2-connector.service.
The connection to your sandbox should work now. You can see the capev2.log for debug output and troubleshooting:
root@cockpit:~# tail /usr/share/asgard-analysis-cockpit/sandbox/capev2.log
22-11-15 12:07:46 DEBUG: Starting new HTTPS connection (1): localhost:443
22-11-15 12:07:46 DEBUG: https://localhost:443 "GET /api/sandboxes/a/reports/pending?limit=10&offset=0 HTTP/1.1" 200 13
22-11-15 12:07:46 DEBUG: no pending references found
22-11-15 12:08:46 DEBUG: Starting new HTTP connection (1): 192.168.0.50:8000
22-11-15 12:08:46 DEBUG: http://192.168.0.50:8000 "GET /apiv2/cuckoo/status/ HTTP/1.1" 200 289
22-11-15 12:08:46 DEBUG: Starting new HTTPS connection (1): localhost:443
22-11-15 12:08:46 DEBUG: https://localhost:443 "GET /api/sandboxes/a/get-sha256s-without-report?limit=10 HTTP/1.1" 200 13
22-11-15 12:08:46 DEBUG: Starting new HTTPS connection (1): localhost:443
22-11-15 12:08:46 DEBUG: https://localhost:443 "GET /api/sandboxes/a/reports/pending?limit=10&offset=0 HTTP/1.1" 200 13
22-11-15 12:08:46 DEBUG: no pending references found
root@cockpit:~#
3.10.2. Analysis Cockpit Sandbox Usage
>Evidence Collection\Collected Evidences>Evidence Collection\Sandbox ReportsIn the Collected Evidences view you can see previously analyzed files or
upload files for analysis by yourself:
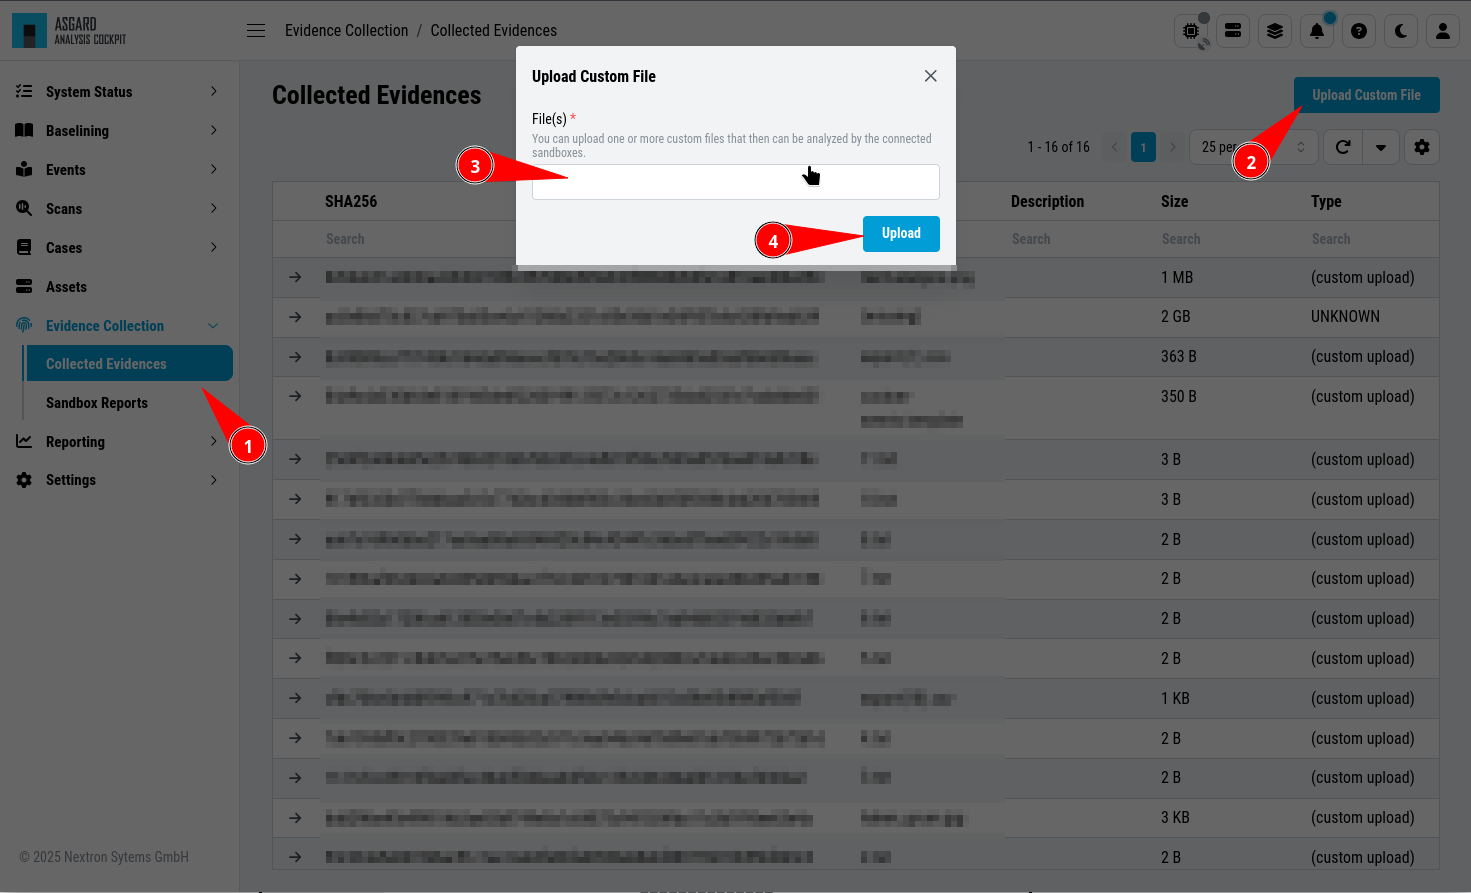
After your file has been uploaded, you have to wait until your sandbox
is finished with analyzing the file. Change to the Sandbox Reports view
to see the status of the files.
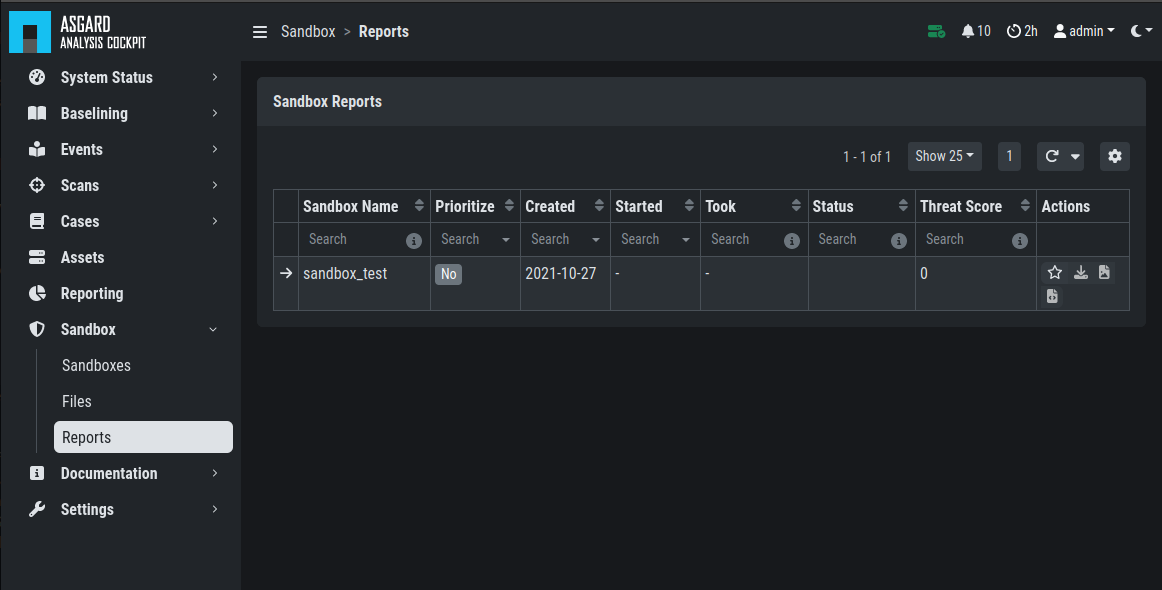
Once the file was analyzed and the reports are ready, you will see that
the status of the file changed to SUCCESS and the buttons REPORT,
JSON and HTML can be clicked. You can now download the report.