8.1. Certificate Validation Failed
If you receive the following error, SSL/TLS interception interrupted the installation process.
nextron@cockpit:~$ sudo nextronInstaller -cockpit
[sudo] password for nextron:
Ign:1 https://update3.nextron-systems.com analysis InRelease
Err:2 https://update3.nextron-systems.com analysis Release
Certificate verification failed: The certificate is NOT trusted. The certificate issuer is unknown. Could not handshake: Error in the certificate verification. [IP: 192.168.3.21 8080]
Since we do not support setups in which the connections to our update servers are intercepted (see chapter SSL/TLS Interception), the only way to resolve this problem is to deactivate SSL/TLS interception for our update servers.
8.2. Log File Import of Previous Years
The log file format of (old) THOR scan logs is the original SYSLOG format, which contains no year value in the timestamp of the message header.
You can modify the timestamp of old THOR logs by using the following script:
8.3. Disk Watermark
Elasticsearch has a disk watermark that it uses to determine if it should go into read-only mode. If the disk is too full, Elasticsearch will stop accepting new data. This watermark is set to 95% by default and will prevent data loss by stopping the system from writing to the disk.
The disk watermark of the Analysis Cockpit however is set to 90%. This means on a 1TB drive you need at least 100GB of free space or the Analysis Cockpit will put itself into read-only mode. We set this value lower than the default of Elasticsearch to give you more time to react before Elasticsearch goes into read-only mode, in which case you would need to reset the read-only mode manually on Elasticsearch.
The below message shows up in the Analysis Cockpit if the disk watermark is reached:
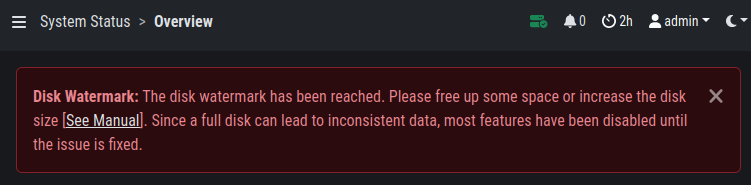
Disk Watermark
If you see this message, the Analysis Cockpit went into a read-only mode and you need to free up some disk space or increase the disk space by allocating more storage to the virtual machine.
To free up some disk space, you can follow the instructions in the next chapter (Regain Disk Space).
If your disk usage somehow got above 95%, Elasticsearch will go into read-only mode nontheless. If this happened, you need to reset the Elasticsearch state after you freed up some disk space. You can achieve this by running the following command:
nextron@cockpit:~$ curl -X PUT -s -u elastic:$(cat /etc/asgard-analysis-cockpit/elastic.password) \
-H 'Content-Type: application/json' \
-d '{"index.blocks.read_only_allow_delete": null}' \
http://localhost:9200/_all/_settings
You should get the following output if the command was successful:
{"acknowledged":true}
Note
Please note that the password changes after the Analysis Cockpit was
restarted, this is why we cat the password directly from the file.
8.4. Recover from a Full Disk
If your disk is full or near full, ASGARD Analysis Cockpit will not work properly. In order to resume its operation you need to make free space on the disk.
We suggest to save the files to another system beforehand, if you want to keep the information for future usage. ASGARD will not need the following files to function and they can be removed safely:
/var/lib/asgard-analysis-cockpit/log/*.gz/var/lib/asgard-analysis-cockpit/events/*.ok
Especially the assignment log can grow big in production environments.
If deleting the logs is not enough, deleting the already read-in events (ending on .ok)
is the next best location to regain disk space. If there are too many files for a
simple rm *.ok, you can use find to delete them:
nextron@cockpit:~$ sudo su -
[sudo] password for nextron:
root@cockpit:~# find /var/lib/asgard-analysis-cockpit/events -name "*.ok" -print0 | xargs -0 -I'{}' rm '{}'
If Elasticsearch does not automatically work again after cleaning up some disk space, restart
it under Settings > System > Services or with sudo systemctl restart elasticsearch.service.
If this is not working either, you may need to disable Elasticsearch's read-only mode. See
Disk Watermark for a how-to.
Deleting the files given above should be enough to resume operation. If the disk on your ASGARD Analysis Cockpit is full because of growing data over time, the disk space should be increased. If that is not an option you can delete old scans as described in section Regain Disk Space.
8.5. Debug Failed File Imports
Check for reported problems using this command:
nextron@cockpit:~$ sudo su -
[sudo] password for root:
nextron@cockpit:~$ find /var/lib/asgard-analysis-cockpit/events -name "\*.problem"
Make sure that you're able to see the imported log data and review the selected time range in the time range picker in whatever view you're reviewing the data. Be aware that the log data gets indexed with the creation timestamp of the log lines not the time of their import.
This means that if you're importing log data that is old, the default date range set in the date range picker may be too narrowly defined so that you're just unable to see the imported data.
8.6. Fixing a Broken Proxy Configuration
Sometimes during installation, proxy settings get mixed up or a typo in the proxy URL leads to a broken Internet connection.
It is not trivial to fix this situation, since the proxy settings collected during installation are changed in so many different locations on a Linux system for all the different services and command line tools.
8.6.1. Broken before Analysis Cockpit Installation
If you have set a wrong proxy before the package installation using the sudo nextronInstaller -cockpit command and the installer failed to fetch the required packages from our update servers, perform the following steps.
Fix the proxy string in the file /etc/apt/apt.conf.d/00proxy
nextron@cockpit:~$ sudoedit /etc/apt/apt.conf.d/00proxy
Then rerun the installer.
8.6.2. Broken after the Analysis Cockpit Installation
If your infrastructure has changed and you have to change the proxy server sometime later, edit the proxy settings in the Web GUI.
Settings > System > Proxy