6.1. Open a Case for Editing
>Cases\THOR Cases
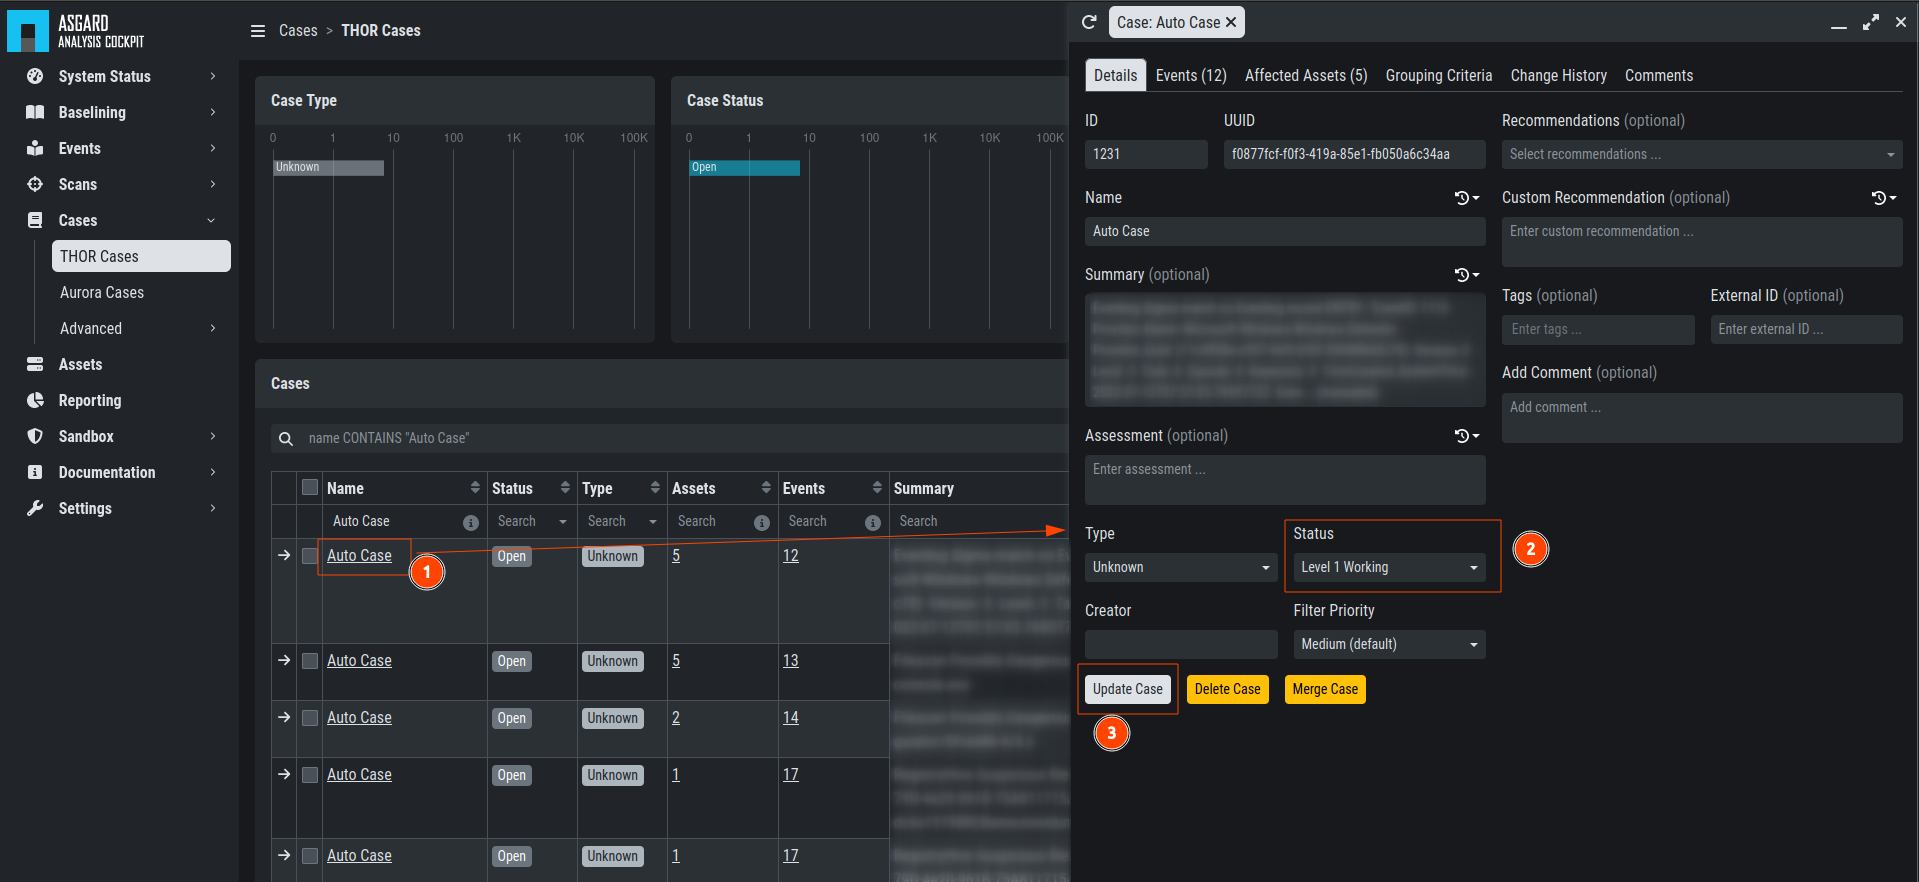
The picture below shows the Case Management view with cases that have
been created with the Auto Case feature. You can see those cases
by filtering the Name column to only contain the Auto Case
value and the Status column to only contain the Open value.

Opening a Case for editing
In our example a Level 1 Analyst would now pick one of these open cases
and set the Status to "Level 1 Working". To do this, they would open
the case by clicking on the magnifier button and modify the status
to Level 1 Working and then click Update.
Change Status
Now the logs within the case can be analyzed and results can be documented in the assessment field. Recommendations can be set from the canned recommendations list. Columns can be faded in and out and comments can be added.
6.2. Case Dispatching
Let's assume, our Level 1 Analyst concludes, that this is a "Legitimate Anomaly". They will now set the status to "Level 1 Finished" and update the case. After setting the case to "Level 1 Finished" the case becomes visible to the Level 2 Analyst.
6.3. Closing a Case
>Cases\THOR Cases
Let's assume, that a Level 2 Analyst now picks one of the cases in status "Level 1 Finished" and starts working on this case.
In this respect we assume, that something suspicious has been found,
that needs further analysis by the system administration team. In most
organizations this will be controlled through the organization's action
request or ticketing system. So, we assume, that we will close the case
in the Analysis Cockpit as it is progressed in another system. The
status is changed to closed and the case gets updated.
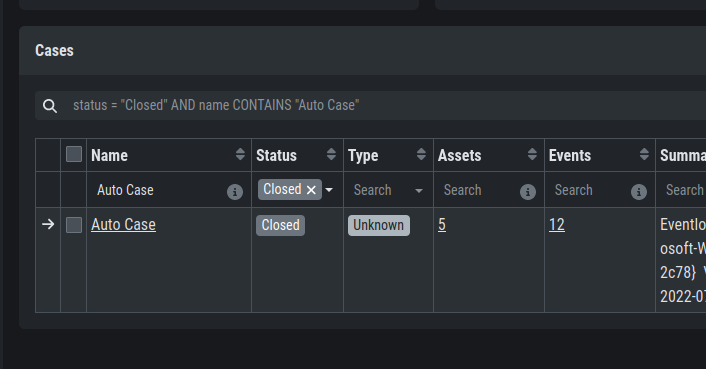
Closing a Case
Note
The Analysis Cockpit provides interfacing to action-request and external ticketing systems using the API.
6.4. Grouping Criteria
>Cases\THOR Cases
The Grouping Criteria of cases are the fields that are used to assign events to cases. There are three types of grouping criteria:
Auto Case IDs
Conditions
Regex
One Case can have multiple grouping criteria. Auto Case IDs are the most performant way to group events into cases. Conditions are used to group events into cases based on the values of the fields in the event - Conditions are slower and should only be used if Auto Case IDs are too broad. Regex should be your last resort and used only if the other two options are not possible, as this is the most performance intensive way to group events into cases.

Grouping Criteria