4.4. Understanding Users, Roles, Rights and Case Status
>Settings\Users and Roles\Roles>Settings\Case Management\ Case StatusThe rights and roles model within the cockpit is aimed to support large multinational organizations with different independent users working with the case management at the same time. An organization responsible for analyzing THOR logs might be split up in groups of analysts.
Within the cockpit, all users have the right to access the logs and
create cases. Within the Case Management section, access rights are
granted depending on the particular state the case is in.
In order to setup your rights management you must first decide about the states you want your cases to have, then assign rights for a particular state to a role and after that you add users to that particular role.
In order to understand this better, let's look at an example.
Let's assume we have an organization where a Level 1 analyst group located in Frankfurt is responsible for creating cases and providing an initial assessment for cases, while a Level 2 analyst group located in Hamburg is responsible for reviewing, final decision and closing of cases. In order to support an efficient workflow, you would at least need the following states for your cases:
Open (nobody is yet working on this case)
Level 1 Working (Level 1 is working on this case)
Level 1 Finished (Level 1 has finished and nobody is now working on this case)
Level 2 Working (Level 2 is working on this case)
Closed (Case closed)
A workflow could look like this:
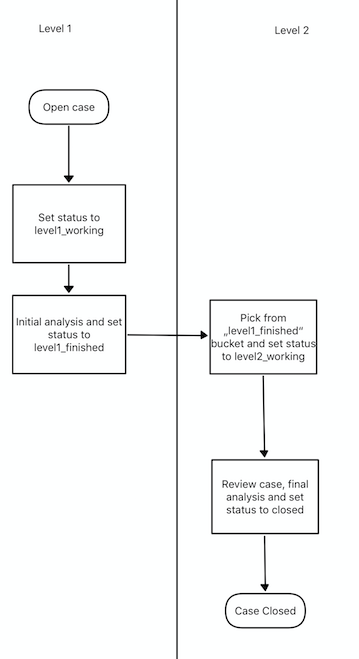
Workflow open Cases
For your convenience, we already did the setup for this example and ship all Analysis Cockpit with this workable template by default. You are free to use, modify or delete the corresponding rights, statuses and roles.
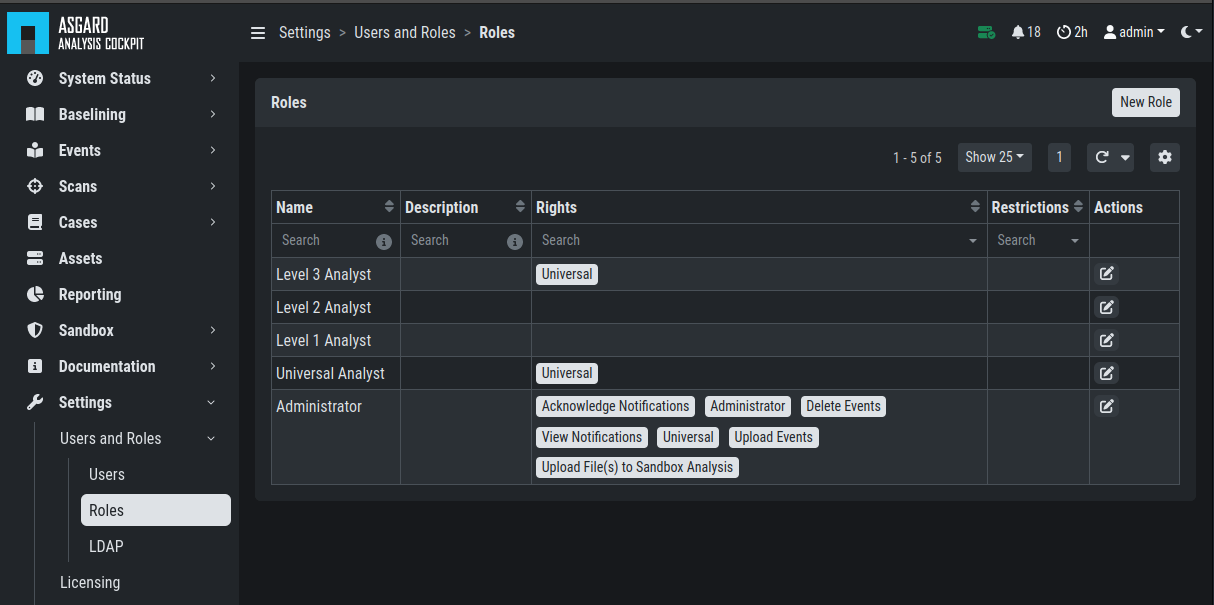
Roles
Every Role can have different rights, corresponding to one specific status. The predefined statuses come with a Sort Order (you might need to display this column). This is the order those statuses are shown when you are creating/updating a case.
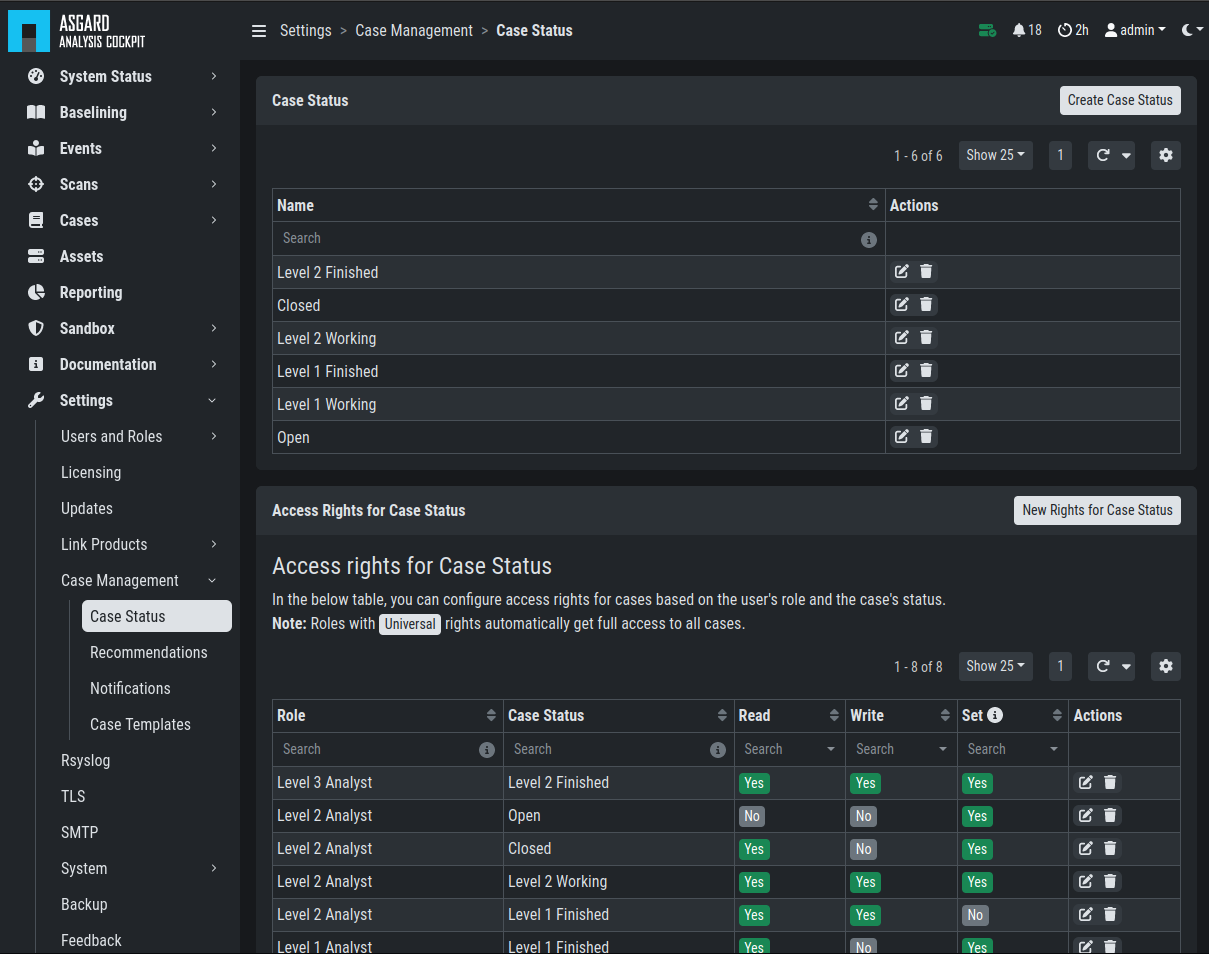
Case Status
In the lower table you can manage the access rights for every Role and
every Case Status. We can give the suitable rights to our generated
roles by clicking the New Rights for Case Status button on the right.
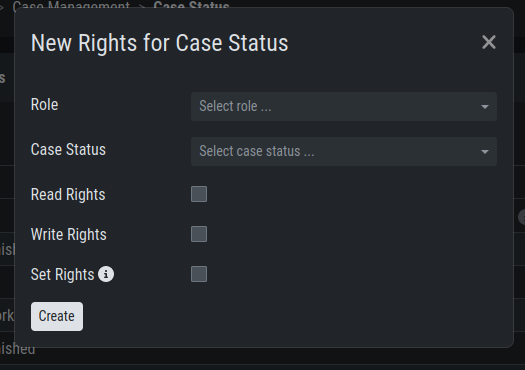
Edit Rights – Read, Write, Set
The three permissions can be explained as follows:
Read
The selected Role can read from the defined Case Status
If this permission is set, any Case with this Status can be seen
Write
The selected Role can write/modify the defined Case Status
If this permission is set, any Case with this Status can be modified
Set
The selected Role can set a case to the defined Case Status
Role can change the case status to this status even without having write permissions for it
To visualize the role and case status relationship, we created the table below:
User |
Role |
Case Status |
Permissions |
|---|---|---|---|
User A |
Level 1 Analyst |
Open |
Read, Write, Set |
User A, who is a member of the Role Level 1 Analyst, can see (read) and modify (write)
any case with the status Open. They can also set any case, which they can read,
to the status Open.