5.2. Manual Case Creation
>Baselining\THOR Events
This section walks you through the manual case creation. This method gives you more flexibility in terms of conditions and details regarding the cases, but is more time consuming.
The results of the cases depending on specific settings you are setting during the case creation.
5.2.1. Case Creation Basics
Create a new case following these steps:
Filter your Baselining Events accordingly. In our example, we searched for a specific file name with a unique hash. Click
Create Case
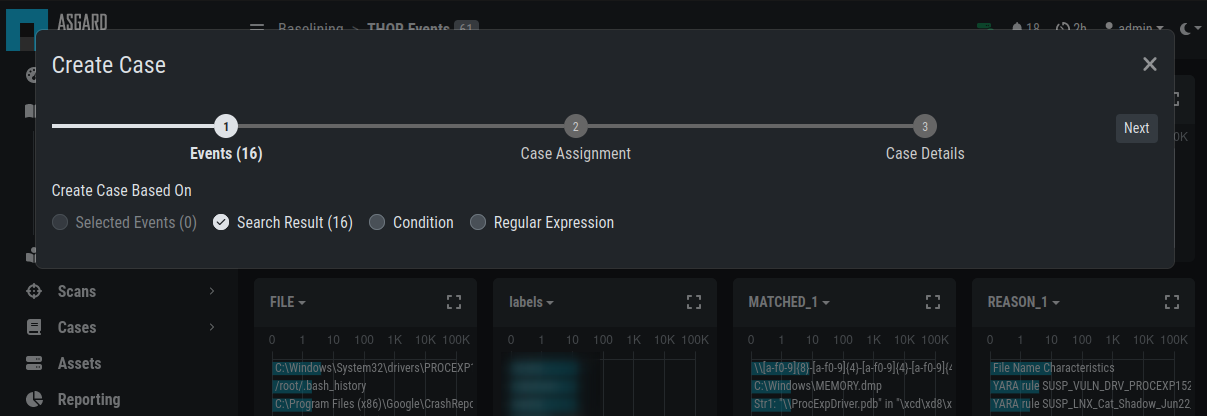
Select on which criteria you want to base the case on. The default
Search Resultis sufficient enough for beginners, but for advanced analysts this might not be the best way to create a case.Conditionis the most flexible and readable, whereasRegular Expressiongives you the ultimate flexibility with a heavy performance impact (we recommend to not use Regular Expression for this reason)
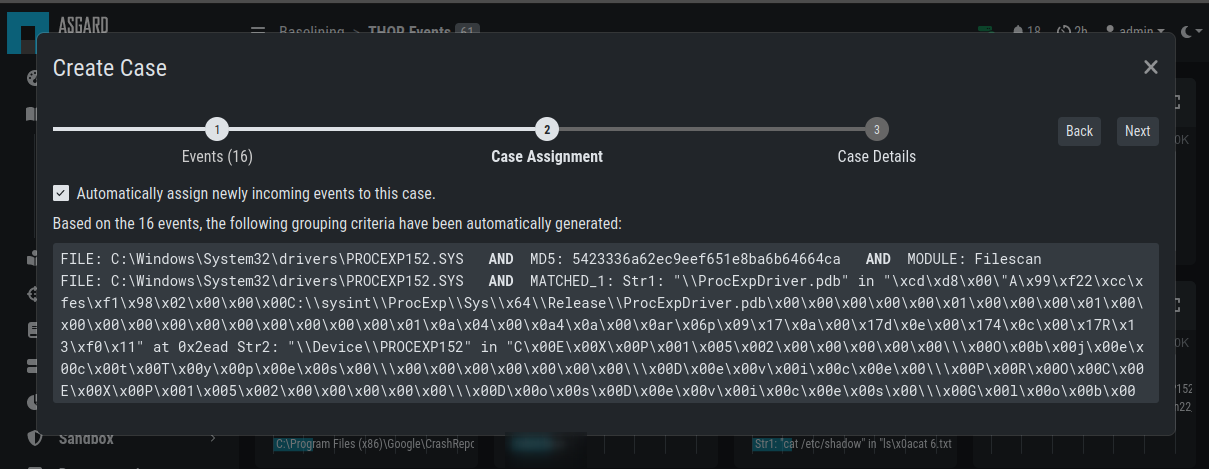
Click next and you will see your resulting
Case Assignmentlogic. SetAutomatically assign newly incoming events to this case.to automatically move new incoming events to this case. If you want to create a case which will not receive new events, remove the checkbox.
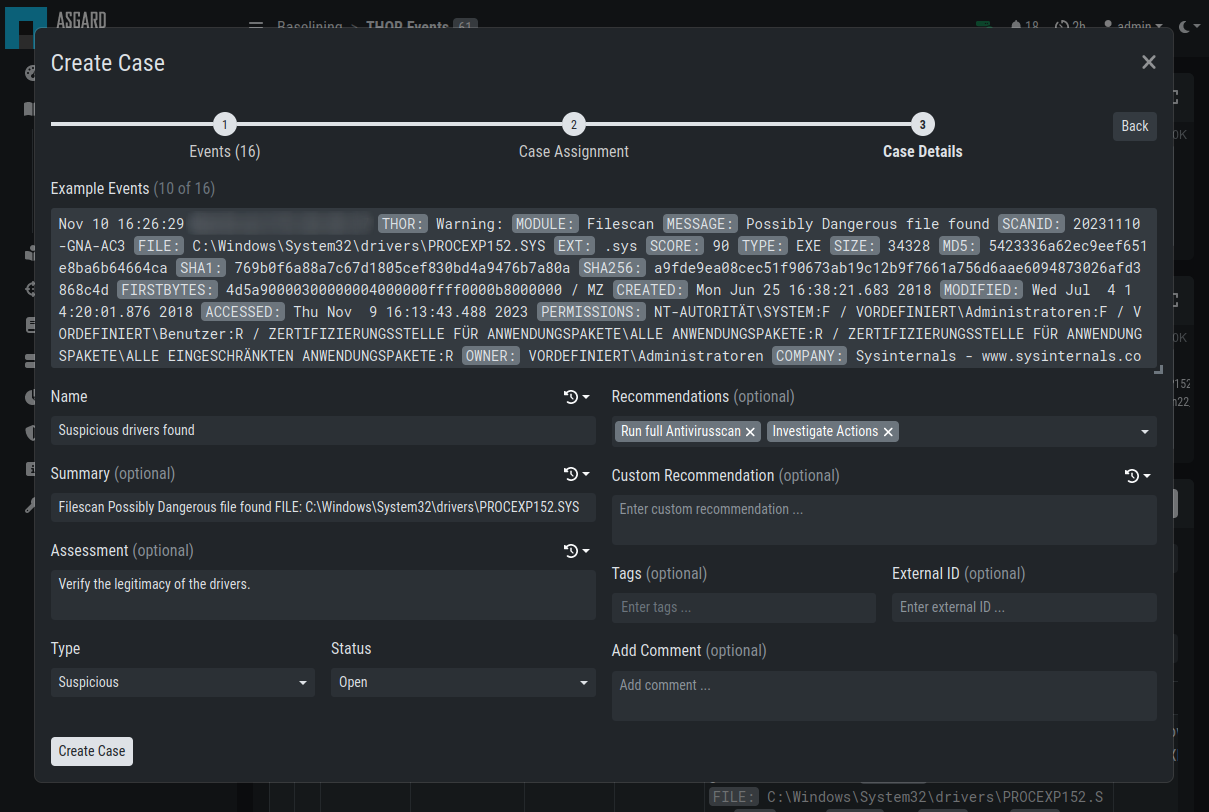
Set a case name, which serves as title - use keywords that make it easy for other analysts to find it based on a few terms (e.g. if a false positive was caused by matches in savedsearch.conf, use this filename in the title of your case)
Select a sample event for the summary field
Add your assessment
Choose one or more recommendations
Select a case type (see the Case Types for a detailed description of every case type)
Select a case status (usually used to mark it as 'work in progress' or to forward it to the next team)
Select a display priority (usually used to mark the importance of the case)
Submit case by clicking the Create Case button

5.2.2. Select Log Messages for a Case
In order to create a meaningful case, you typically start with selecting logs or groups of logs that you want to be contained in the case. This can be done in various ways:
by adding a custom filter in the search bar
by clicking on one of the bars in the bar chart
by clicking on the filter symbol in a field in a log line
by using the Lucene Search Query
You can generate a filter condition using an expression in the search field, choosing a category, deciding whether the expression should be contained, equal etc. and clicking the search button. Clicking on one of the bars in the bar chart or on the filter symbol in a field in a log line will generate a filter condition, too.
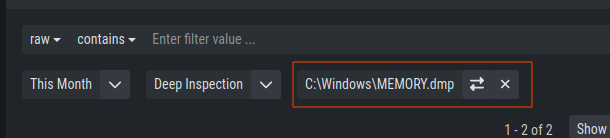
Active Filters
Hint
Filters can be negated by clicking on the two arrows symbol or delete it by clicking on the cross symbol.
Using the built-in custom filters is the most common and easiest way to select groups of logs.
For those who prefer Lucene, an additional Lucene search bar can be activated and can even be combined with the built-in custom search.
In order to activate the Lucene Query search just click the contains button and
choose Lucene Query.
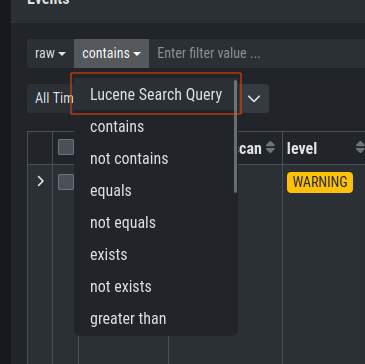
Lucene Query
Note
You can Alt/Shift click items in the top field view to add them as a NOT filter to your search.
5.2.3. Case Creation Using a Condition
Note
Condition Cases are widely used since their Condition is easier
to read and can be modify. This is why we recommend to use them, especially
in bigger organizations, with multiple people working on multiple cases.
To create a case with a condition, click the Create Case button and
select Condition. Any filter set before clicking the Create Case
button will appear automatically in this view. This makes it very easy to work with.
Keywords in the same field are combined by OR, you can negate them by
clicking the NOT button or combine them with AND by clicking the
Add AND Condition button. The filter bubbles you have generated before
will be used as default. You are free to use, modify or delete them.
Conditions only match on the raw field.
The Test Condition button will calculate the numbers of hits and
return some matching and some non-matching events as an example.
Creating Cases through Condition
Again, you may or may not add auto assignment for future incoming log lines, summary, assessment, case type, recommendations or a comment. After closing you will find the selected logs have been removed from the logs section.
5.2.4. Case Creation from Search Results
Note
Since the Event Assignment logic of Search Result cases cannot be modified,
we do not recommend to use this method to create cases in bigger organizations.
If you do not need to change the logic how events are assigned to certain cases,
this is the best method to use.
This is the easiest way to create a case. Create the filters, so
that you only see the logs you want to be contained in your case. Then
click the Create Case button, select Search results and add a name,
that makes sense to you.
If you want future incoming logs with the same log lines automatically assigned to this
case, you have to tick the checkbox Automatically assign newly incoming events to this case.

The Case Details screen is the same regardless of which Event Assignment
logic you chose to use for your chase. After creating your case, you will find the log section
empty. This is because the view is still using your filter, but the matching log lines
have been removed from this section and added to the case (again, the baselining view only
shows events which are not part of a case).

Log Section empty
Simply remove the filter and the remaining log lines will show up.
5.2.5. Case Creation from Selection
In order to create a case from a specific selection of logs simply use
the checkboxes at the very left side of the table and click the Create Case button
select Selected events and add a name, that makes sense
to you.

Creating Cases from Selection
After closing you will find the selected logs have been removed from the logs section.
5.2.6. Case Creation Using a Regular Expressions
In order to create a case from a regular expression just click the
Create Case button and select Regular Expression. This lets you
write and test your regular expression.
The Test Regular Expression button will calculate the
numbers of hits and return some matching and some non-matching events as
an example.
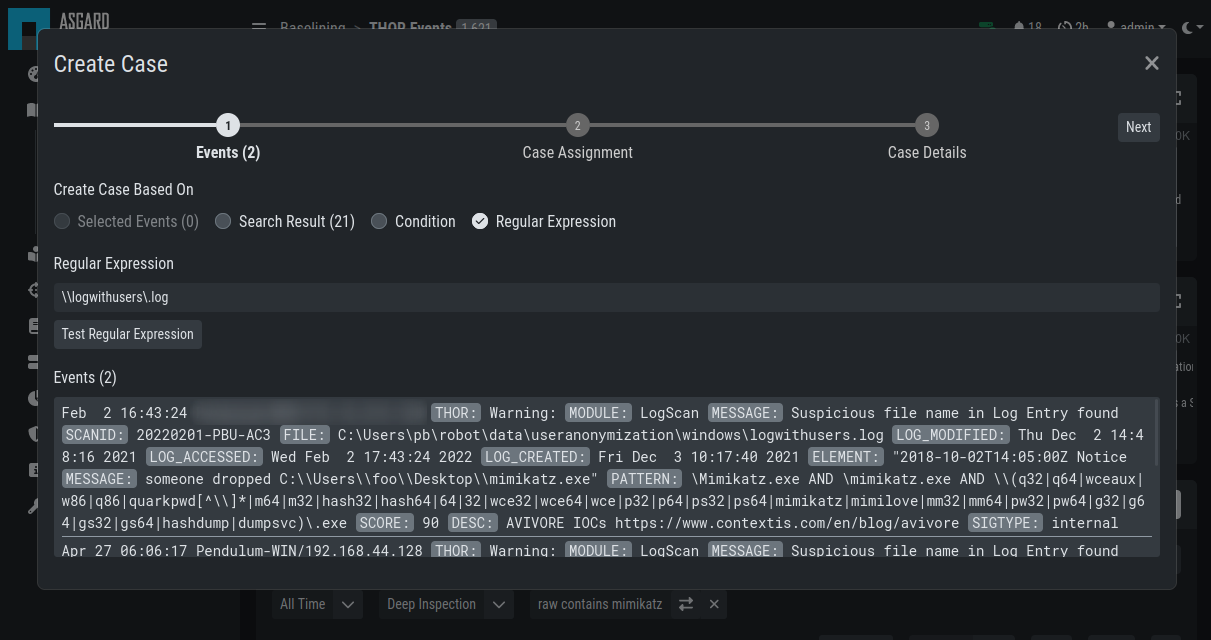
Creating Cases through Regular Expressions
Warning
We recommended to use regular expressions only rarely and with caution. This feature can severely impact the performance of the system. Regex from cases will be applied to every single event on import.
Elasticsearch uses Apache Lucene's regular expression engine to parse these queries. Please take a look at the Elasticsearch manual for further information about the regular expression syntax: https://www.elastic.co/guide/en/elasticsearch/reference/current/regexp-syntax.html